Want to add charm and coziness to your porch? This DIY Bed Swing is the perfect addition to any outdoor space!

I’ve wanted a bed swing for as long as they’ve been around but the timing just wasn’t right with all of our temporary living situations over the past few years. When we discussed plans for the front porch makeover, a bed swing was at the very TOP of my list! Based on the size of our porch and research that I’ve done, a crib mattress size swing seemed like the best option for our space so this tutorial is designed to fit a standard 52” crib size mattress. You can definitely alter the dimension to fit any size mattress or cushions to suit your space!
The tutorial is for an X style design which does require a little extra work and additional cuts but we really wanted to keep the X design to mirror the style of the porch railings.
S U P P L I E S :
- (4) - 2” x 4” x 10’ pieces of untreated pine wood (Sides and back)
- (4) - 2” x 6” x 12’ pieces of untreated pine wood (Base and top trim pieces)
- (2) 1 lb packs of 2 1/2” wood screws
- 1 inch paddle bit for drill
- Power tools: drill, chop saw, table saw, jig saw
- Wood stain or paint depending on preference. I used left over deck sealer from the same project. Valspar Semitransparent deck sealer in Fresh-Brewed Brown.
- 50 ft 1” synthetic rope (may need additional length if greater than 8 ft ceiling height. General rule: 2 x the ceiling height for each side.)
- (2) 1/2” x 12” Zinc-Plated Eye Bolts
- Crib Mattress
- Mattress Cover
P R O C E S S :
BUILD THE TWO SIDES:
- Cut 2”x4” boards into 4 pieces 15” long for uprights.
- Cut 2”x4” boards into 4 pieces 31” long for top and bottom of the sides.
- Attach the uprights to the top and bottom using wood screws.


- To Make the X design, cut 4 pieces slightly longer than needed corner to corner of the frame and trace the angle of the cuts. One piece will be continuous and the cross section is traced but cut in 2 sections to attach to the full length board.


BUILD THE BACK:
- Cut 3 uprights 15” long for the back (one on each side and a center)
- Cut 2 pieces 52” for the top and bottom.
- Attach the uprights to the top and bottom using wood screws.
- Make the X design in the same way as used for the sides.
BUILD THE BASE:
- Cut 2 pieces 64” for front and back.
- Cut 4 pieces 55”.

- Cut 2 pieces 28” notched out 3” long by 1 1/2” height to fit flush with the front and back boards. The other 4 boards cut 55” will fit inside this piece as well so there are no exposed edges.


- Srew all boards together from the outside of the 28” board.
- Cut 2 bottom face plates 58” long x 2 5/8” height for the front face of the swing base.
ATTACH THE SIDES TO THE BOTTOM:
- Screw the two sides to the base from the underneath, leaving a 1” gap on the front and back.
- Attach the back in the same way as the two sides.
- For the top trim piece: Cut (2) 2 x 6” pieces 33” in length for the sides and cut (1) 2 x 6” piece 49” in length. Attach from the bottom with wood screws leaving a 1” overlay.

STAIN OR PAINT
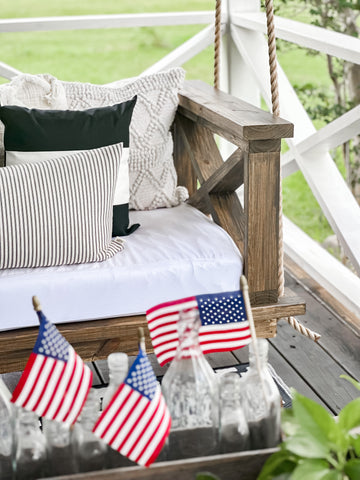
- For this swing, I chose to stain the swing using the same semitransparent wood sealer that I used for the deck of the porch. It gave a nice contrast to the white mattress cover and the white railings and house color.
ATTACH THE ROPE:
- Drill 1” hole in the center of the board 1 1/2 inch from the end. Repeat for the front and back boards.
- Prop swing up on boards, scrap wood or anything near the height you choose to hang the swing. We used milk crates to hold the swing in place.
- Place rope through the hole and tie a knot leaving extra rope beyond the knot for adjustments if needed in the future.
- Average swing height is 18-24" from the ground. (We hung our swing at 21").

SECURING THE SWING:
- In the attic, add additional support pieces for the swing using scrap from the 2x6s from the project. Secure them across 2 rafters in the attic using wood screws. Secure the eye bolts to the additional support pieces by drilling 1/2” holes in the porch ceiling and the support pieces in the attic. Put eye both through the hole then secure with washers and nut.
- Note: Eye bolts will be 62” apart to allow clearance of the rope from the sides of the swing.
Want to see a video of the process. Click here for the YouTube video of the swing build.