
Hey there crafty Falloween friends! Are you tired of the same old plastic orange pumpkins on every doorstep in the neighborhood? Well we have a super fun way to turn a simple fence board into a gorgeous lantern that’s sure to elevate your Fall porch and light up the night like never before!
Before we get started with the DIY, I’ve teamed up with my friend Jennifer from Birch Lane by Jennifer to bring you a BUY option! I know time and tools can be a problem with some of these DIYs so if you’d like to purchase her adorable, high quality lanterns made of cedar shown below, you can visit her website here.


Now if you’ve got your tools handy and you’re ready to get crafting, let’s get started with this Falloween DIY!
What Supplies Do You Need?
To build a small wooden lantern with finished dimensions ~8”H x 5 1/2” W x 6” D, you will need the following supplies:
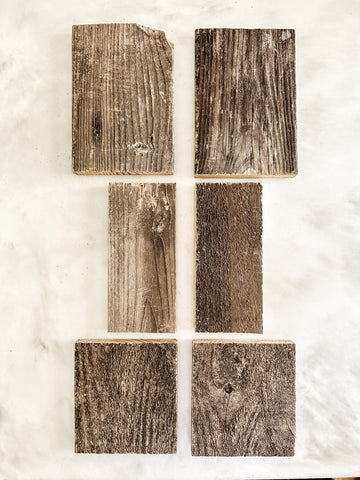
- 1 piece of 3/4”x 6”x 6 ft fence board (We used reclaimed fence board!)
- Tools: Jig saw, chop saw, table saw
- Nail gun with air compressor or hammer
- 15 gauge 1 1/2” Finishing nails
- Printed face pattern (You can access my free printables collection here. If you’re not a subscriber, you’ll receive an email with the password when you subscribe here. The faces can also be drawn free hand too.)
- Battery operated Tea Light or Touch Light
- Optional branch for decoration on top of lantern
*Dimensions can be scaled up to make a medium and large size.
*Safety Tip: Since the lanterns are made of wood, use a battery operated light and DO NOT use a traditional candle.
Let’s Label:
For clarity, we’ll label each piece of wood used in the project:
- A - front
- B - back
- C - side
- D - side
- E - top
- F - bottom
Step-by-Step Process
1. Cut the fence board into four pieces 7” long (pieces ABCD).

2. Set two pieces aside to use for the front and back (A and B).
3. Cut two pieces to resize to 3.5” wide (C and D).

4. Cut two pieces 6” long for the top and bottom (pieces E and F).

5. Glue and nail the sides (CD) to the front and back (AB).


6. Print out face templates & cut out the black areas to use as a template for tracing.

7. Trace the template onto the front piece of wood (A).

8. To cut out the face, drill a starter hole for each section using a 3/8” drill bit. Cut out the face using a jig saw.

9. Glue and Nail the bottom (F) onto the lantern.

***Optional: Add a 2”x2” piece of wood and/or a piece of a branch or stem to the top (E) which can be used as a handle.

And there you have it! You have successfully built your own wooden lantern. Now you can place a battery operated tea light or Touch Light inside for a cozy and warm ambiance.

Building your own wooden lantern is a fun and rewarding project! It allows you to showcase your woodworking skills and create a beautiful piece that can be used as a centerpiece or a decorative item in your home or porch for years to come!
I’ve created a short video of the process with some up close views of the lanterns on Instagram that you can see here. I’d love to see your projects and creations! Feel free to send me a DM or an email with your photos or videos! Happy Falloween Friends!

Please note***This post contains affiliate links. If you make a purchase via one of these links I may receive a small commission from your purchase. This commission does not add any cost to you but helps me to continue to share new products, companies and ideas with you. Thank y'all for always being so supportive!!