
Do you have a thrifted furniture find that you love but the fabric is worn and dated? Looking for a simple way to update an old bench for extra seating? Well today I’m sharing all of my tips and tricks to help you take your piece from drab to fab!

My youngest son is the little music prodigy of the family and I’ve been on the hunt for a vintage upright piano for years! When we scored a free piano on Facebook Marketplace I was beyond excited! (Sharing all about the piano in an upcoming post!)
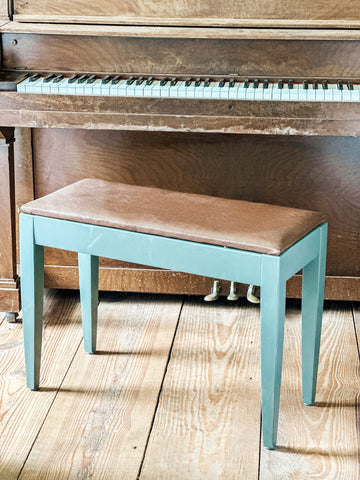
Since we didn’t have a piano bench I began scouring Facebook Marketplace yet again and found this sweet, simple little bench. The lines and style were perfect for our piano however, the fabric and color just didn’t work well in our home.
I posted a poll on Instagram stories and many of you read my mind and voted to paint it black! I used Fusion Mineral Paint in the color Ash on the bench legs and frame.
Up next was fabric selection! I love how with a little creativity and some fabric, you can transform ordinary pieces into true beauties! Reupholstering a bench not only gives it a fresh new look but also allows you to add your personal touch! I found this fabric at Hobby Lobby and loved the simple pattern and color scheme. It also harmonizes well with the piano keys don’t you think? (Get ready for lots of music puns in this post!)

Once you’ve selected the finish and fabric it’s time to gather the rest of your supplies!
S U P P L I E S :
- Staple Remover
- Needle Nose Pliers
- Razor knife
- Scissors
- Staple Gun or Pneumatic Upholstery Stapler
- Fabric
- Extra batting (optional if needs replacing)
- Screwdriver for removing top of bench
So now that we’ve gathered our supplies, let’s get started with the upholstery work!
P R O C E S S :
First, start by removing the bench seat from the frame. Next, it’s time to get rid of the old fabric! My favorite tools are the RockSteel Staple Remover and a pair of Needle Nose Piers.

Carefully remove each staple using a slight rocking motion with the staple remover. Avoid rocking or putting too much force on the frame or seat. Since many of the pieces I reupholster are vintage, the staples often break when trying to remove them! That’s when the Needle Nose Pliers become life-savers!!! Use the pliers to grab and remove any staple fragments left in the frame.

Once the fabric is removed, keep it!! You will use this fabric as a template for the new fabric.

Next, lay the old fabric onto the new fabric as a template. Place the right side (outside) of the old fabric onto the wrong side (inside) of the new fabric.


Cut the new fabric using the old fabric as a template leaving an additional 1-1.5” around the old fabric.


If the bench seat batting is worn or needs replacing now is the time to do it using new batting and spray glue. My batting was in decent shape on this piece so I didn’t replace it. (If you have any questions about that feel free to reach out!)
Next, lay the bench seat onto the wrong side (inside) of the new fabric. Once the bench seat and fabric are lined up, begin stapling! I use a pneumatic upholstery stapler that I’ve had for over 10 years now but a simple staple gun works just as well for small projects.
Start on the long horizontal pieces. Pull the fabric taught and add a staple right in the center on each side. Repeat the process on the short vertical sides adding one staple in the center. This secures your fabric but still allows movement for corners and lining up patterns.

Next, tackle those corners! I used to dread corners so much but after a few projects I learned to just do my best and enjoy the beauty in imperfection! For a simple look on a square corner, pull the center of the fabric to the center of the bench then overlay the fabric on top lining up the pattern if needed.


Staple the center fabric in place with multiple staples while pulling the fabric taught to avoid any wrinkles or puckers in the fabric.

Repeat pulling the fabric taught and stapling on the outside piece. Continue this process over the entire surface of the bench until the fabric is secure.
Finally, reattach the seat and enjoy your new masterpiece!!


If you’d like to see a short video of the process on Instagram you can check it out here. I would love to see your reupholstered creations! Please tag me on social media or send me an email with some before and after! Happy Upholstering friends!

Please note***This post contains affiliate links. If you make a purchase via one of these links I may receive a small commission from your purchase. This commission does not add any cost to you but helps me to continue to share new products, companies and ideas with you. Thank y'all for always being so supportive!!