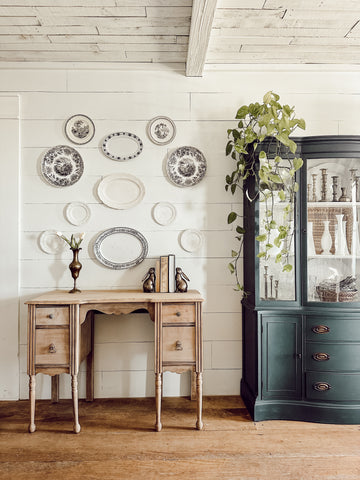
Are you tired of your old, worn-out furniture? Do you want to give it a fresh new look without breaking the bank? Well, you're in luck! In this blog post, we're going to dive into the world of furniture refinishing with a power washer. Yes, you heard that right - a power washer!
Please note***This post contains affiliate links. If you make a purchase via one of these links I may receive a small commission from your purchase. This commission does not add any cost to you but helps me to continue to share new products and ideas with you. Thank y'all for always being so supportive!!
Here’s a look at the vanity “before”. I thrifted this sweet little vanity over 10 years ago and it’s survived so many moves but has gotten banged up in the process! I have the mirror for it…somewhere. I’m waiting for it to turn up in some random box or hiding place!

So What's the Deal with Power Washers?
Before we get into the nitty-gritty of refinishing furniture, let's talk about power washers. These hardworking tools are not just for blasting away dirt and grime from your patio or car. They can also work wonders on your furniture! A power washer uses high-pressure water to remove old paint, stains, and varnish from surfaces, making it the perfect tool for refinishing projects when used properly.
Prepping for the Power
Now that you're all pumped up about power washers, it's time to get down to business. Before you start power washing your furniture, you need to do some prep work. It's best to work outdoors in a grassy or gravel area rather than cement to prevent staining or discoloration. Next, remove the hardware. Then gather your supplies to get started!

What You'll Need
- Power Washer (at least 1500 psi). I used a 3100 psi with a 25 degree nozzle for this project.
- Stripping Solution/Gel (I used Citristrip)
- Safety goggles
- Disposable paint brush/chip brush & container
- Sand paper (I used 60, 120 and 220 grit)
- Orbital and Detail Sander
- Sanding brushes (optional for projects with spindles).
- Sealant or wax (I use Fiddes Wax for raw wood projects).
**Links for all of the supplies can be found here.
Step 1: Apply Finish Remover
Now comes the fun part. It's time to unleash the magic of the finish remover! Put on your protective gloves and grab your trusty paintbrush. Apply a coat of finish remover to your entire piece of furniture. Allow the finish remover to dry for ~15 minutes.

Step 2: Power Washing Like a Pro
Alright, it's time to unleash the power! Start by adjusting the pressure on your power washer to a level that won't damage your furniture. It's best to start in an inconspicuous place and test different nozzles to prevent damage to the wood. Then, hold the nozzle about 6-8 inches away from the surface and move it in a sweeping motion. Watch as the power washer effortlessly strips away the old finish, revealing the beautiful wood underneath. It's like magic, but with water! If the original finish had thick layers or heavy polyurethane, you make need to repeat this step more than once.

Step 3: Sanding
Welcome to the fun part of furniture refinishing – sanding! Grab your sander and get ready to expose the magic of your piece. Detail sanders work best on frames and in corners or small areas. Orbital sanders are the best option for large surfaces such as a table top or headboard of a bed. Since this piece has both types of surfaces, I used both sanders.
Start with the rough stuff, using a coarse-grit sandpaper to tackle any left over varnish and rough patches. I used 60 grit sand paper with the detail sander first on the entire piece. Remember to follow the wood
grain and keep the sandpaper along the piece. As you progress, switch to finer-grit sandpapers. Next, I used 120 grit over the entire piece followed by 220 grit to leave a soft and smooth finish.


Step 4: Finishing Touches
Once you've finished sanding, it's time to add the finishing touches. First dust off the piece with a clean cloth rag or a blower to save some time. You can choose to leave the wood bare but I recommend a light coat of clear furniture wax to protect the wood.

Caution: Power Washing Addiction
Now, a word of caution: power washing furniture can be addictive! Once you see the amazing results, you'll want to power wash everything in sight! If you’d like to see the spindle bed I also used this method to refinish, you can read the blog post here.

There you have it - a quirky, fun, and slightly unconventional way to refinish your furniture. With a power washer in hand, you can transform your old, tired pieces into stunning works of art while saving a little time and energy! So, grab your power washer and let the adventures begin!

If you’d like to see a full length video of the process, you can watch my YouTube video here. I can’t wait for you to try this method and I would love to see your furniture rehab projects! Happy Power Washing friends!


1 comment
Learn how to easily refresh your vintage table with a power washer. Transform antique furniture into stunning pieces easily!